Because there wasn’t one for me so I made it for you
STEP 1:

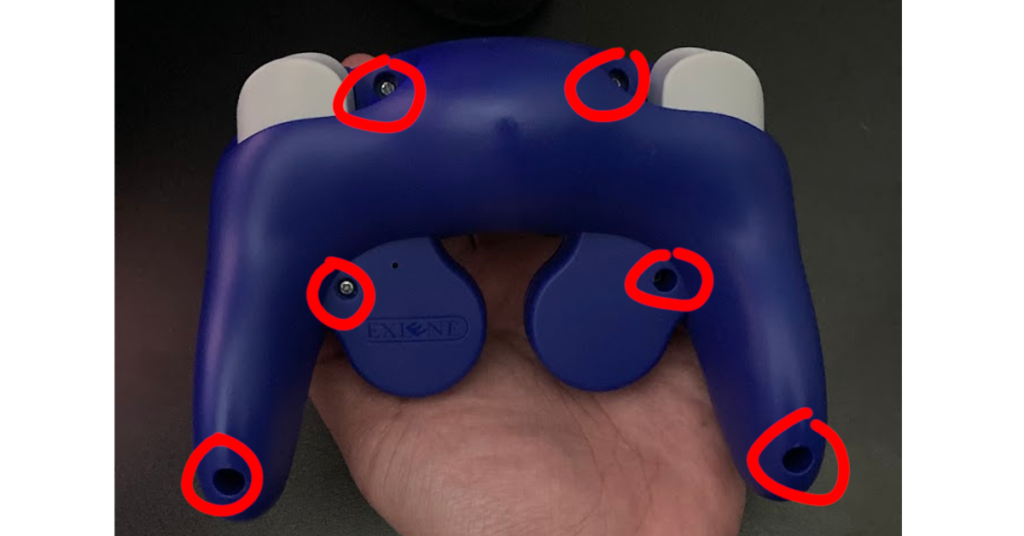
Remove the 6 screws on the back of the shell. No special screwdriver is needed as this controller DOES NOT use a tri-wing screw.
STEP 2:

Pry opens the controller at each of the handles seams, preferably pry with a plastic tool to prevent major damage. Pry until the casing below the D-Pad pops open then move to the next handle and pry the handle until the casing below the C-Stick pops open. Doing this ensures that no unnecessary damage is done to the plastic shell. Afterwards the controller shell should open with no other problems.
KEEP in mind not to lose any pieces that may fall out during opening the shell.
STEP 3:

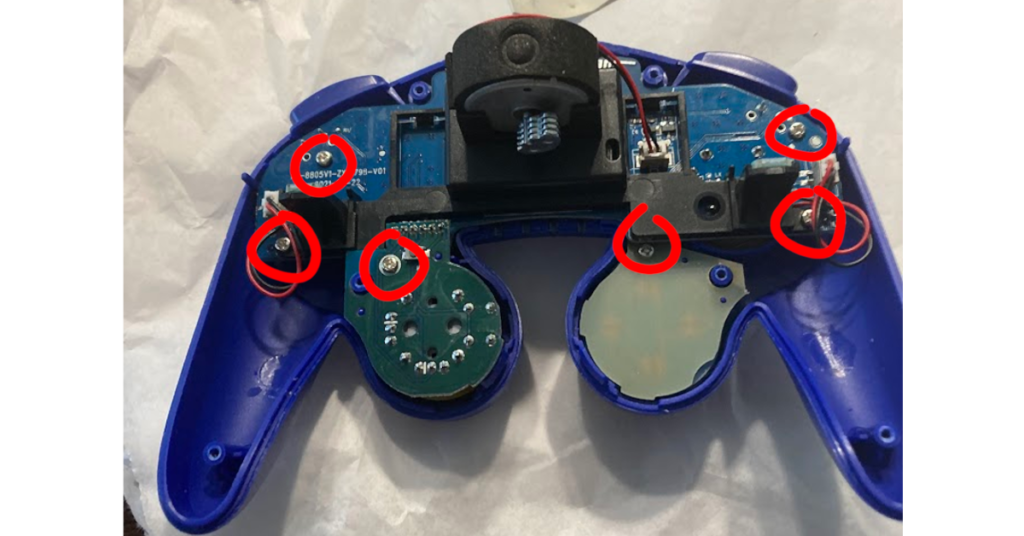
Remove these 6 screws to pull out the PCB (Circuit) board. These screws are the same types as before, no special tool needed.
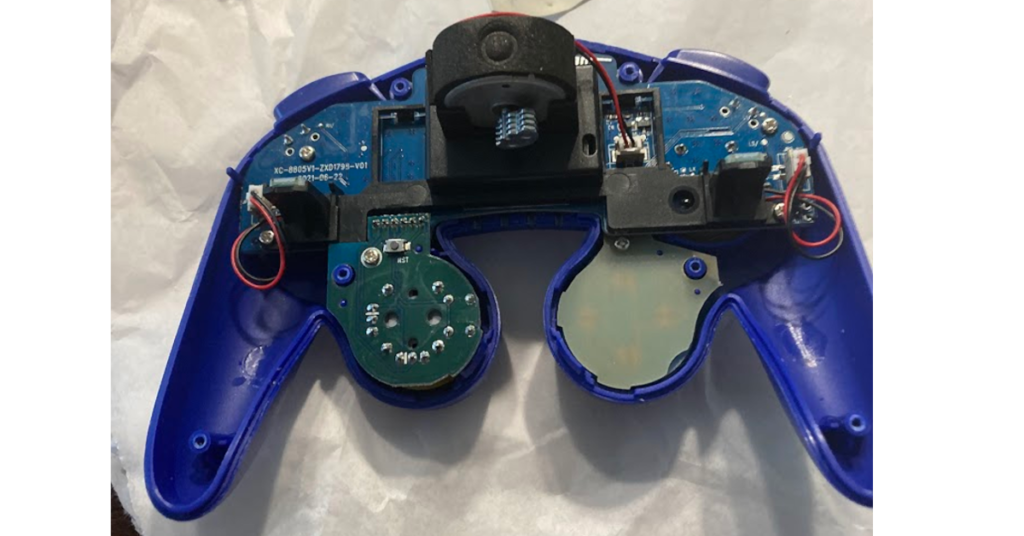
WE’RE IN!
You now have access to do what you need to do whether it be replacing buttons, new controller sticks, or whatever you may think of.
SOME TIPS I LEARNED
[STIFF FACE BUTTONS?]

When I reassembled the controller the buttons felt kind of stiff. So I loosened the three screws a bit behind the face buttons to allow for flexibility when I push down, making it feel as it did before. In general be careful not to tighten the screws on the PCB too much!
[TRIGGERS]
The rubber conductor or rubber pad looking thing has grooves that are able to be tucked into where it sits so keep that in mind.
(MODABILITY!!!!!!!!!)
Exlene surprisingly was pretty faithful to the original GameCube controller. Buttons, triggers, and sticks should be swappable with the controller. However some buttons like the X and Y required some sanding to fit in properly, I got mine from Esty so it may have been a small manufacturing error. This in my opinion is the best modern GameCube controller to mod and customize!

